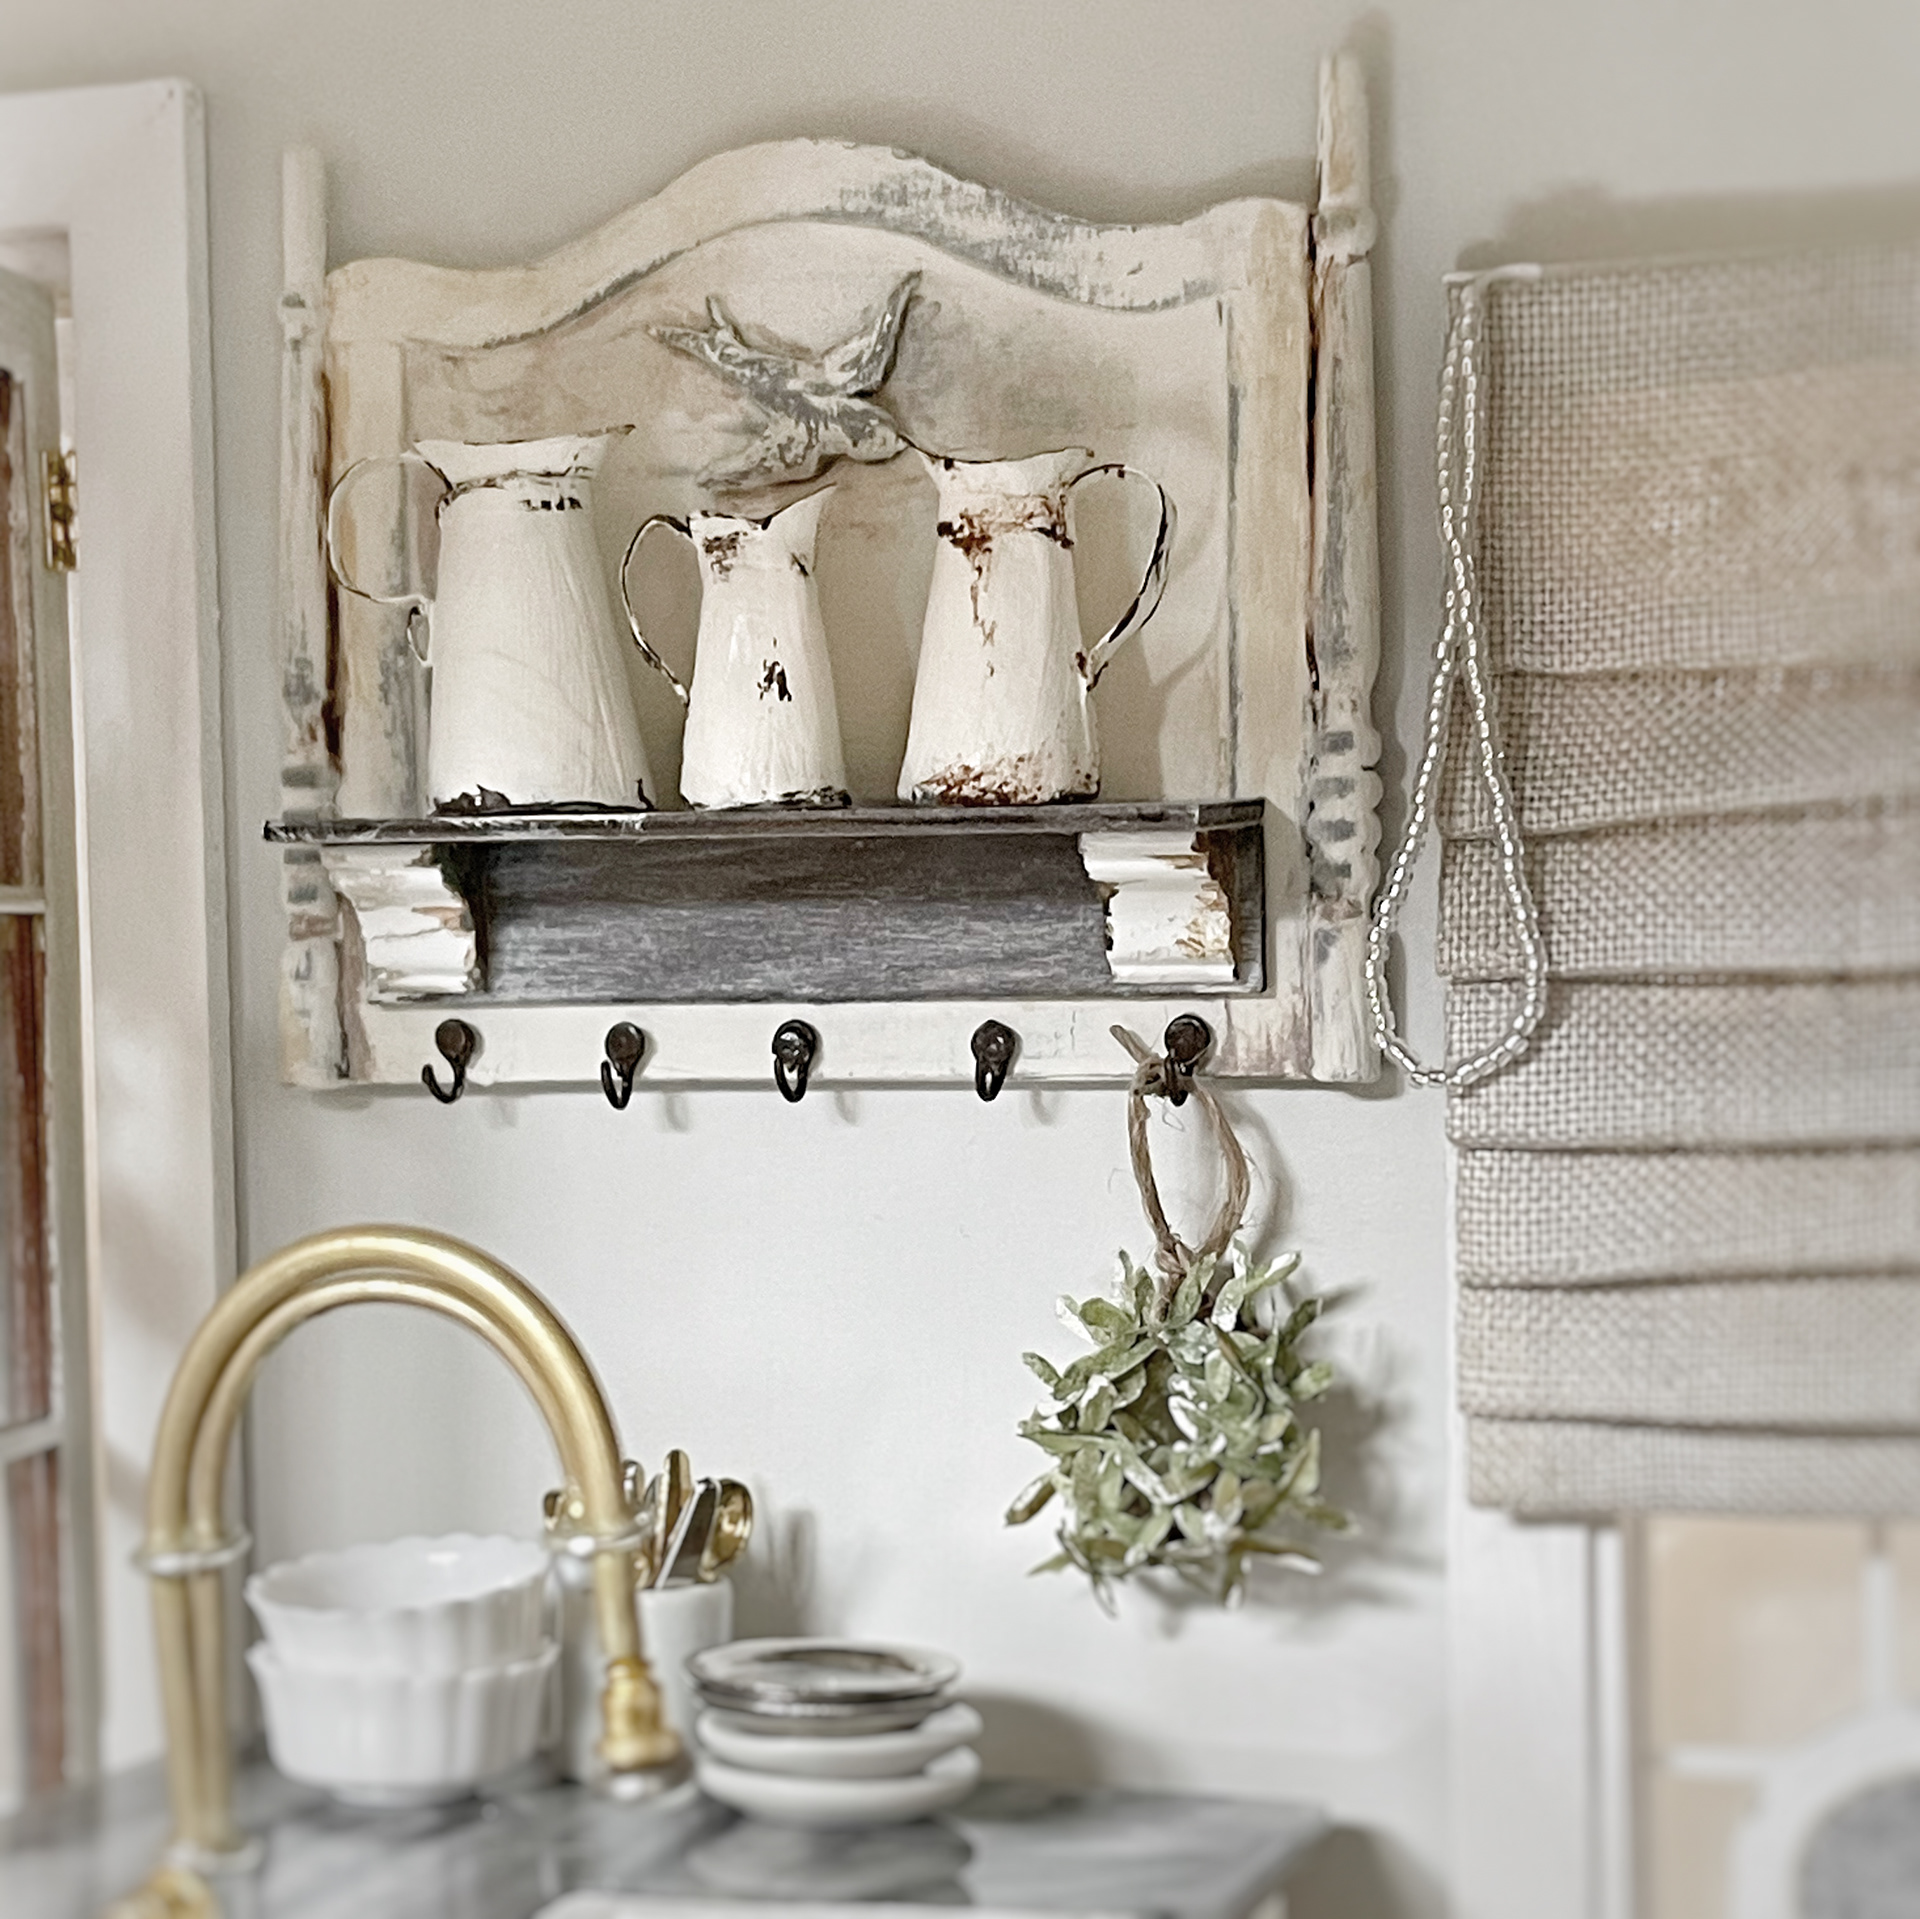
Wall Hooks Tutorial
These are the items I used for this project (links provided below):
Sewing Hook and Eyes
Jewelry Making Flat Head Pins
Wire cutters & Needle-nose Pliers
Multisurface Paint - Farmhouse Chocolate Brown and Black
B7000 Glue
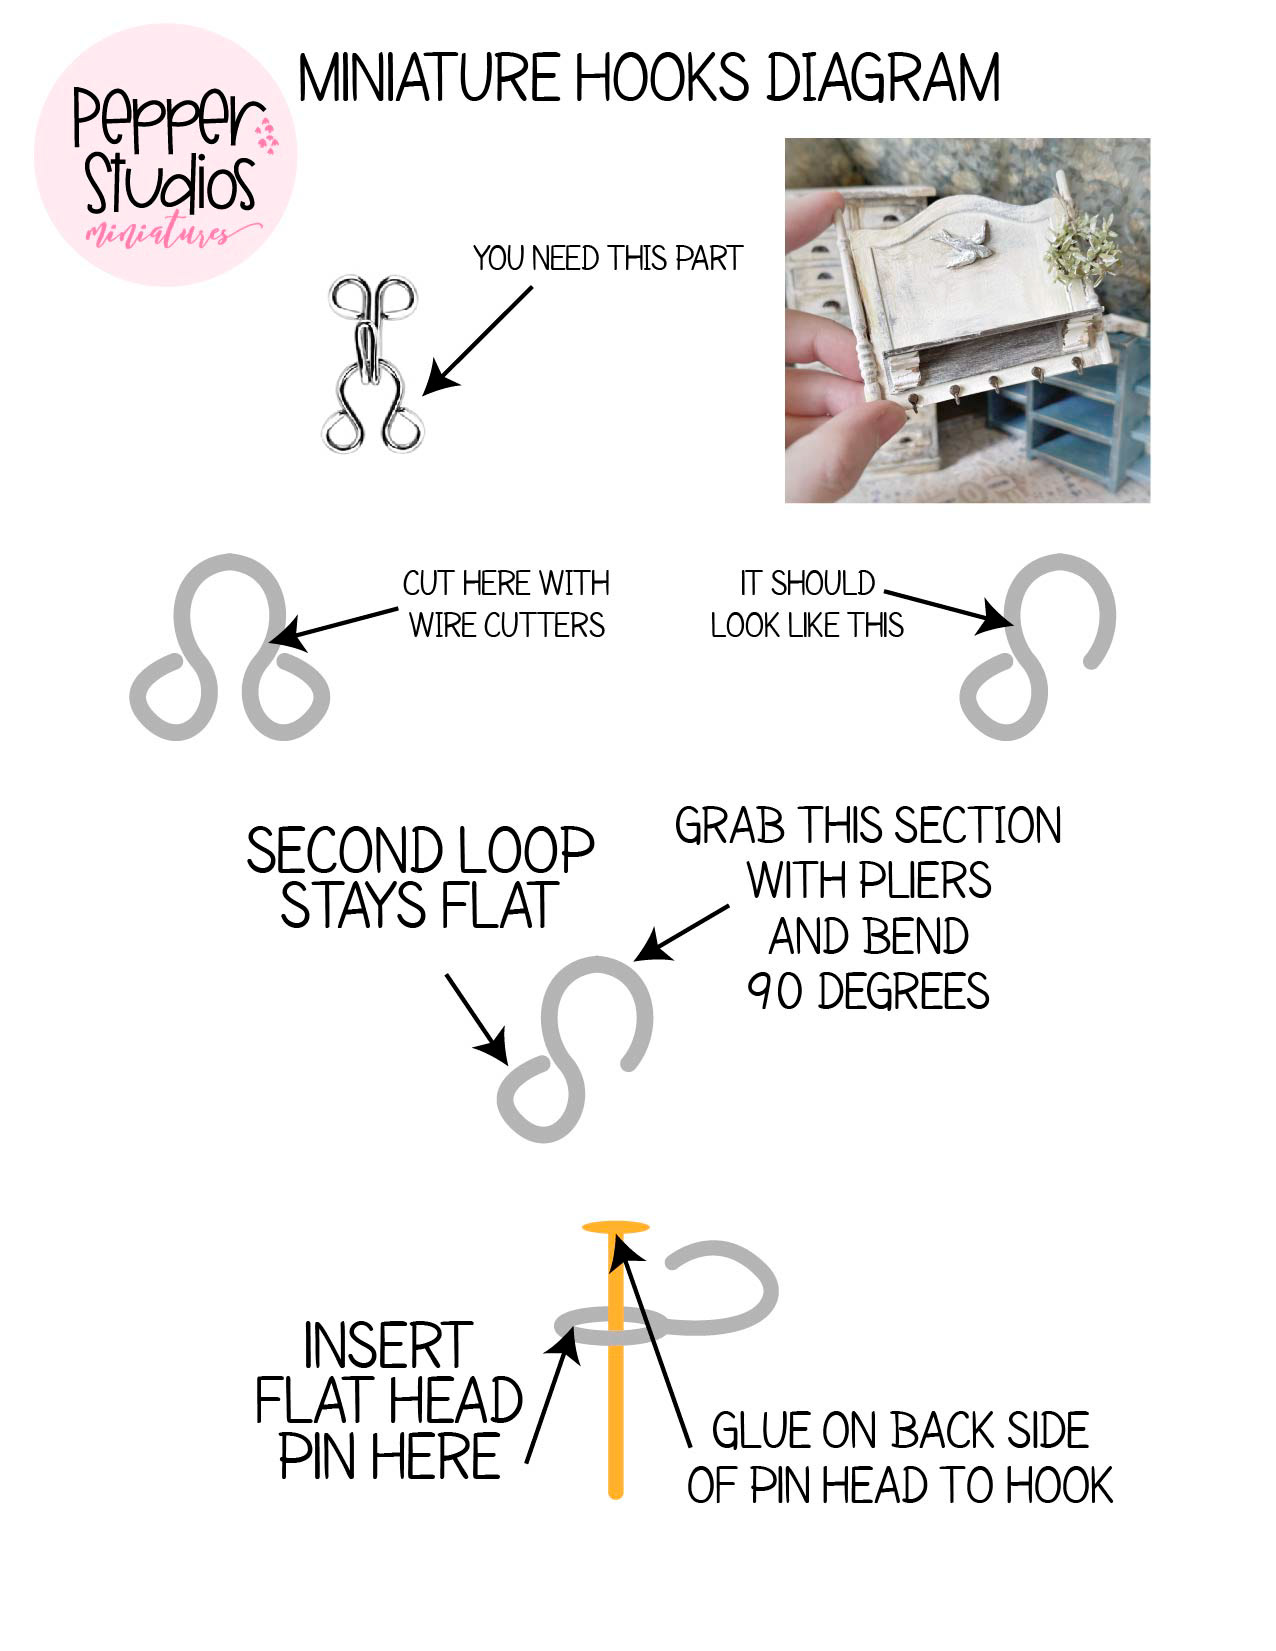
Instructions: You will use the small eye from this set below. Cut one of the sides loops near where it twists back and touches itself. You can hold the hook however you want but this will explain how to bend. Lay the hook flat on table and grab the long part bend towards ceiling. Give it a 90 degree turn. You will need small needle nose pliers and possibly even two pairs for this. The recommended kit below has two pairs of pliers. It's best to hold the loop with pliers then turn the hook part with pliers - just one quick turn. See Diagram for visual below.
Now, insert flat head pin through loop and glue with B7000. Once dry, paint with chocolate brown and black acrylic paint, dabbing it thickly into the area of the pin head to combine the two items visually. You can cut the back of the pin head with wire cutters to your desired length and glue to your minis. the B7000 glue is awesome for this because it has a metal needle head and sticks hard to glue items together. I hope this helps you but please reach out if you have any questions.